Sorry for the break in Blogging but we have just come back from a lovely holiday visiting my family in the South Island. We had such a great time playing in Rivers, throwing stones in lakes, fires on the beach and biking around everywhere. Now we are back into reality and I'm back to blogging again!
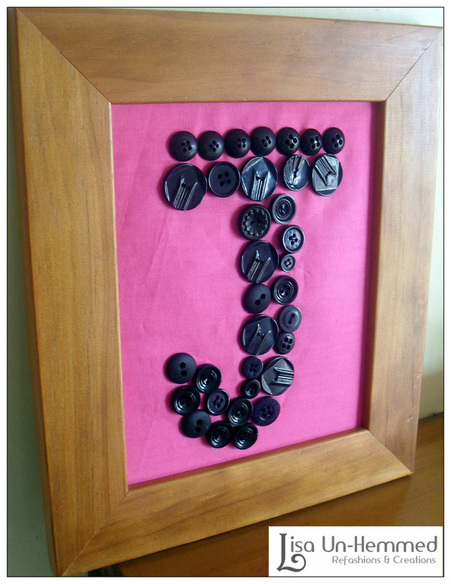
I made this Button Monogram for my lovely niece for her birthday. She loves pink and I had been given all these buttons by my Mum so after seeing this on Pinterest I thought I could make one for her room.
I made this Button Monogram for my lovely niece for her birthday. She loves pink and I had been given all these buttons by my Mum so after seeing this on Pinterest I thought I could make one for her room.
What you need for this -
Material of any colour, I used a plain pink cotton fabiric.
Photo frame, I already had this one that had no glass that I got for $1.
Buttons
Thread that matches the buttons.
PVA glue.
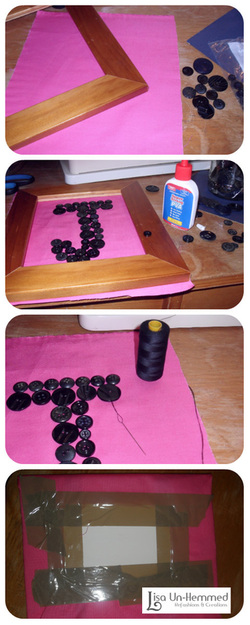
Firstly I ironed the material to make it smooth.
Then I laid out the buttons in the shape I wanted. In this cas the letter J.
I used different size ones to make it interesting.
I tried to just sew them on but found I needed to glue them on first with a little PVA to stop them moving around so much while sewing.
I sewed the buttons on with matching thread. This took way longer than I thought but I'm pretty slow at hand sewing!
Then I attached the material to the base board of the photo frame with some glue and some extra tape as I was impatient.
Then Popped it in the frame and it was done!
My Niece seemed to like it so I think it was a successful project that took me an evening to do and ended up looking really good.
Material of any colour, I used a plain pink cotton fabiric.
Photo frame, I already had this one that had no glass that I got for $1.
Buttons
Thread that matches the buttons.
PVA glue.
Firstly I ironed the material to make it smooth.
Then I laid out the buttons in the shape I wanted. In this cas the letter J.
I used different size ones to make it interesting.
I tried to just sew them on but found I needed to glue them on first with a little PVA to stop them moving around so much while sewing.
I sewed the buttons on with matching thread. This took way longer than I thought but I'm pretty slow at hand sewing!
Then I attached the material to the base board of the photo frame with some glue and some extra tape as I was impatient.
Then Popped it in the frame and it was done!
My Niece seemed to like it so I think it was a successful project that took me an evening to do and ended up looking really good.