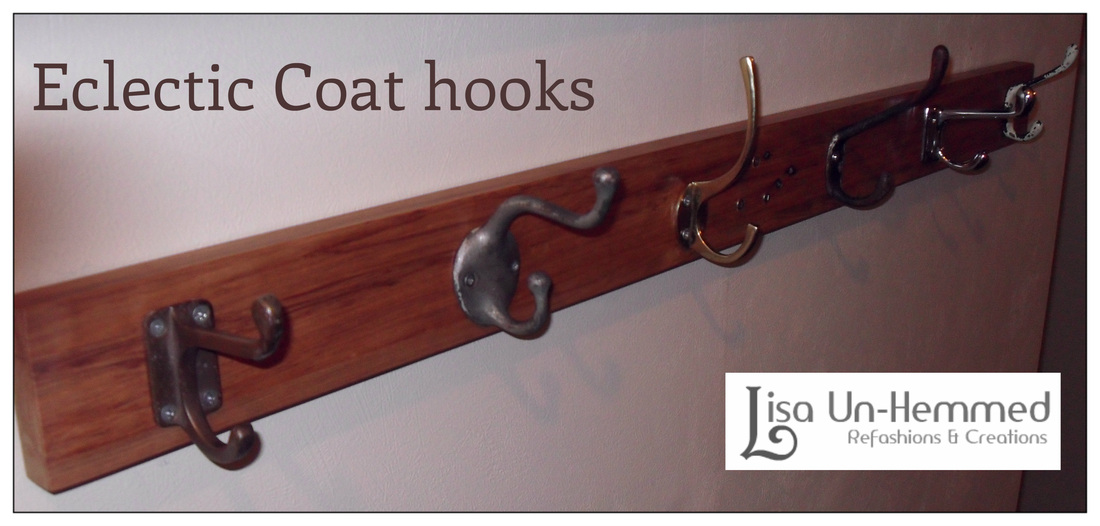
I can't take credit for these coat hooks. They are all by Mr T. But I did help choose the hooks so I'm sure that was an integral part of the creative process.
We spent nothing on making this coat rack. For some reason there was a lovely piece of Rimu sitting in our garage that Mr T was able to take to his uncles and buzz saw into shape. Then a bit of sanding and oiling and the wood base was ready for hook attachment.
The hooks came from my Father in Laws garage. I'm not sure he knows where they came from but they could be from his father so from my children's Great Grandad!
I love that none of the hooks match and they are all different colours and shapes.
The only problem is that we use the hooks constantly so hardly get to appreciate them.
Sorry for the break in Blogging but we have just come back from a lovely holiday visiting my family in the South Island. We had such a great time playing in Rivers, throwing stones in lakes, fires on the beach and biking around everywhere. Now we are back into reality and I'm back to blogging again!
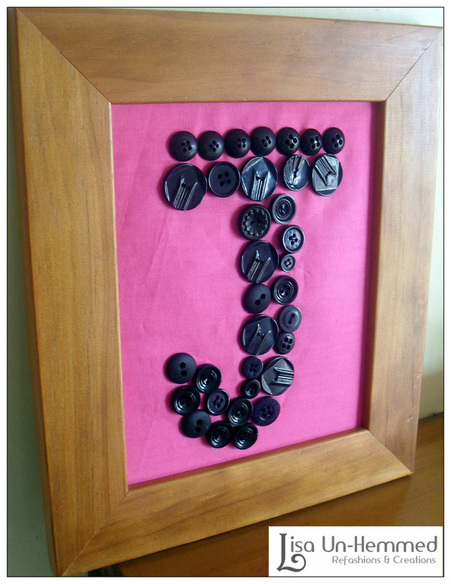
I made this Button Monogram for my lovely niece for her birthday. She loves pink and I had been given all these buttons by my Mum so after
seeing this on Pinterest I thought I could make one for her room.
What you need for this -
Material of any colour, I used a plain pink cotton fabiric.
Photo frame, I already had this one that had no glass that I got for $1.
Buttons
Thread that matches the buttons.
PVA glue.
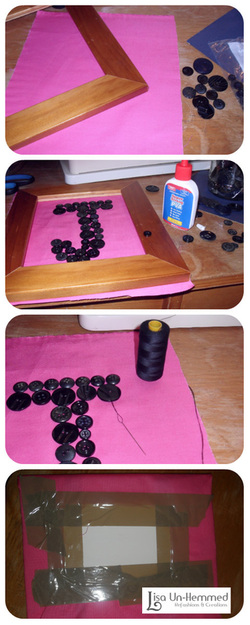
Firstly I ironed the material to make it smooth.
Then I laid out the buttons in the shape I wanted. In this cas the letter J.
I used different size ones to make it interesting.
I tried to just sew them on but found I needed to glue them on first with a little PVA to stop them moving around so much while sewing.
I sewed the buttons on with matching thread. This took way longer than I thought but I'm pretty slow at hand sewing!
Then I attached the material to the base board of the photo frame with some glue and some extra tape as I was impatient.
Then Popped it in the frame and it was done!
My Niece seemed to like it so I think it was a successful project that took me an evening to do and ended up looking really good.
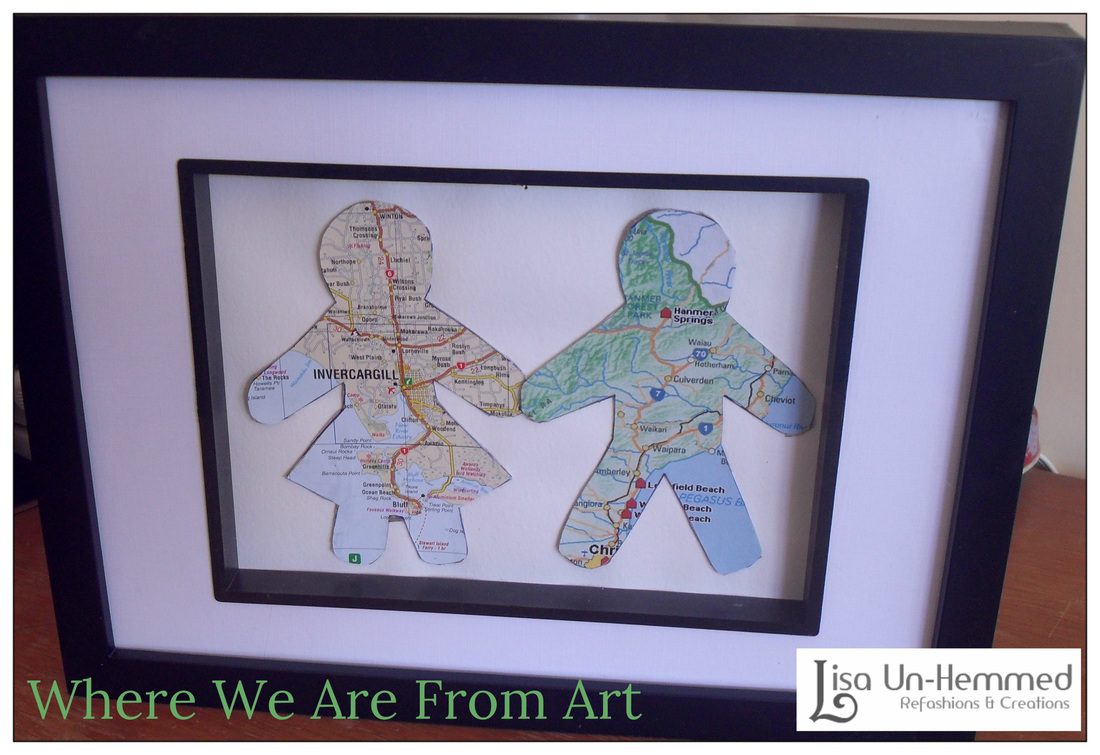
Ages ago I found this
awesome idea on Pinterest for Where We Are From gingerbread men styled map wall art. Unfortunately they had sold out and the site was in the UK, so I thought I might be able to make something similar myself. I decided that this would be awesome gifts for all my family for Christmas. Hence I couldn't post this until after the festivities had ended!
I found an old map book that had been hanging out unloved under the car seat. It was really out of date so perfect for what I needed.
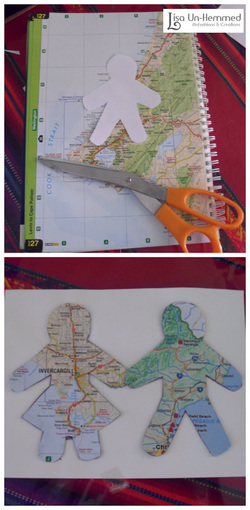
I tried to trace my gingerbread man cookie cutter but the shape wasn't quite right, so I ended up just drawing a shape I liked.
One man shaped and then one with a skirt for the girl.
I then found the map that coincided with where my family was from.
Some maps had to be found on the net and printed out as some of the map areas were on the binding edge, and also I don't have many maps of Malta lying around!
I cut out the map so the word of the persons home town was near their heart. I also cut out some cardboard the same shape and stuck the map onto it to make it a little raised up.
Then the gingerbread shapes were stuck onto some nice textured art paper with some PVA glue.
Lastly it was just a matter of popping them into some nice box frames and I was done! Well after doing 3 or 4 more for the rest of the family!
Everyone seemed to like them and I think I actually should make one for me and Mr T as well. Will have to find another map book to cut up I think!
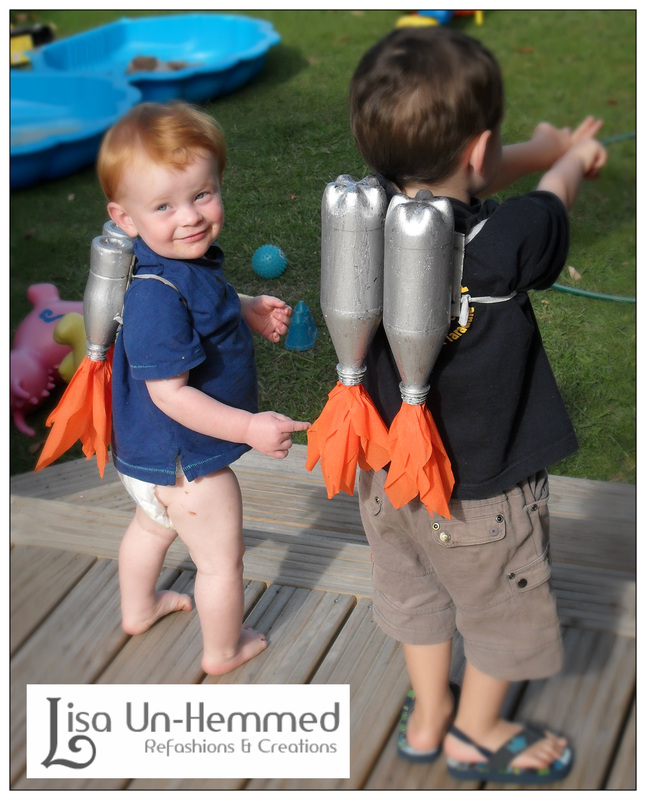
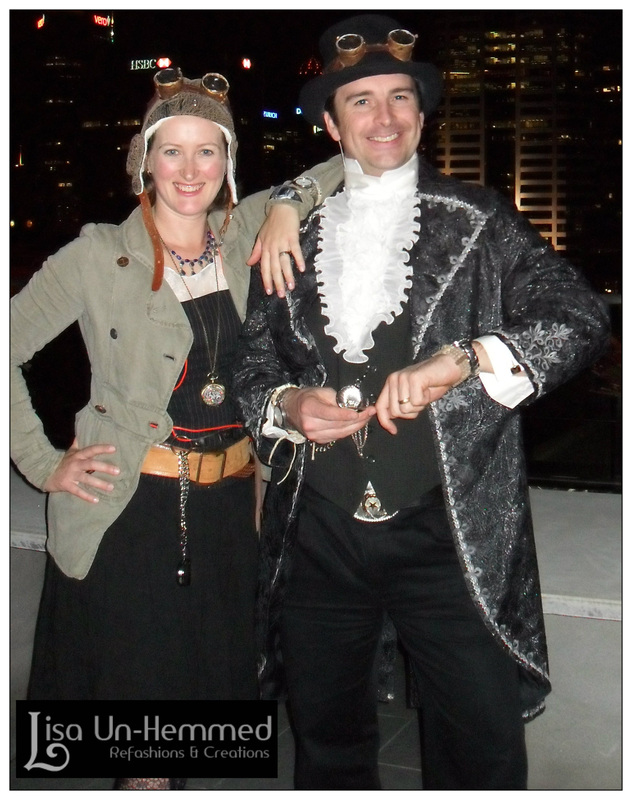
Last year Mr T and I were invited to a party were the theme was travelling. We decided to go outside the box and go as Steam punk Time travelers.
For those of you who don't know what Steam punk is, have a look at this
wikipedia site. It is a very cool alternative style and very fun to dress up.
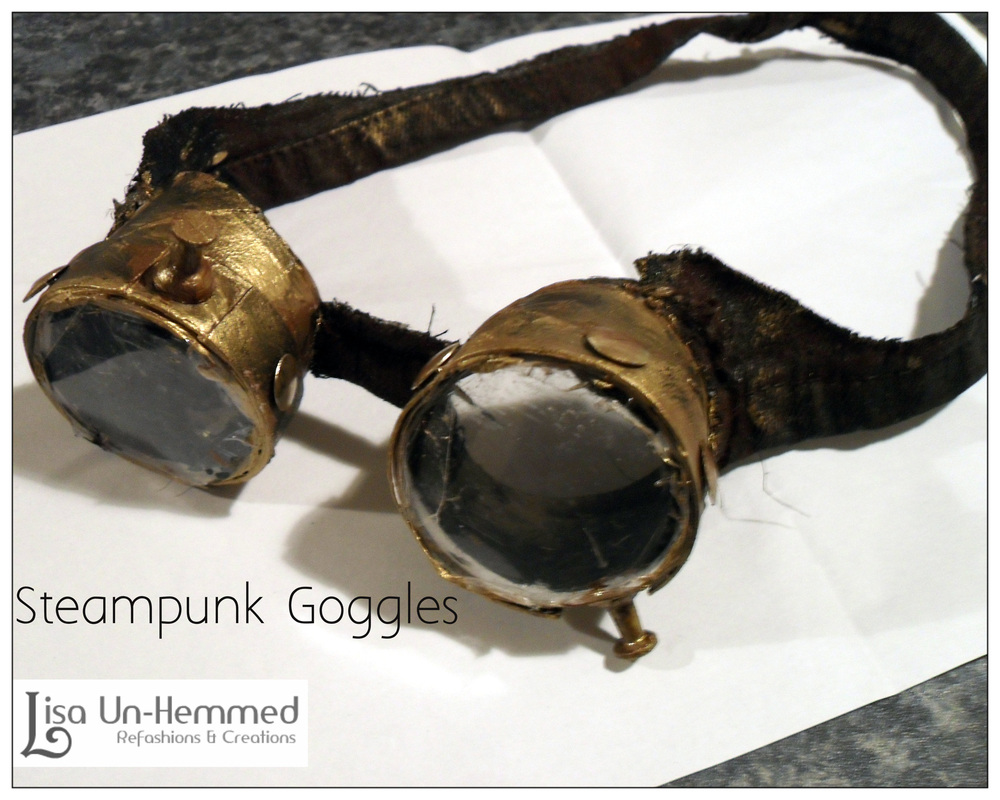
One of the main features of Steam punk is that most of the outfits have goggles similar to aviation goggles but jazzed up a bit.
I really tried to see if I could hire some or even buy some 2nd hand goggles, but with the party looming I just bit the bullet and made some with some great help from Youtube. See these sites for inspiration.
Threadbanger on Youtube.
Instructables.comThis is what I used to make my goggles using everyday items I had at home.
Old denim Jeans
2 Empty Toilet rolls or kitchen roll
Plastic clear drink bottle ( like a Sprite bottle)
Sellotape
Black sewing thread
Sewing Needle
PVA glue
Black, gold, brown acrylic art paint
Paint brush
Thumb tacks of different shapes
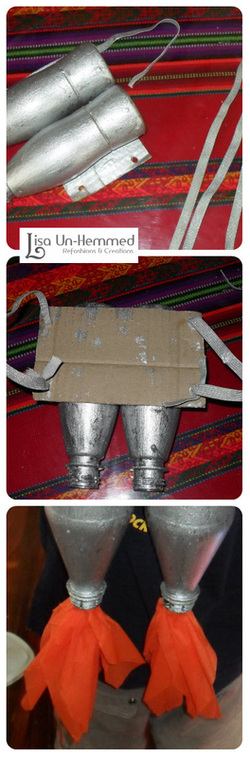
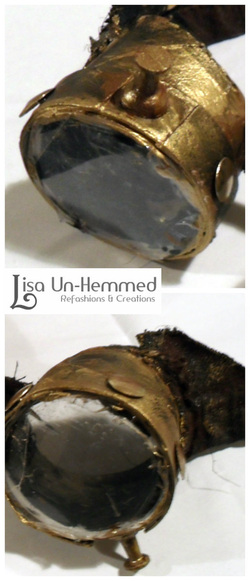
To make the eye pieces first of all I cut the toilet rolls on an angle so it would fit nicely on my head. These would be the round parts of the goggles.
I got the plastic bottle and traced around the end of the toilet roll to make two circles that would fit on the end of the rolls nicely.
I then carefully stuck them on the straight ends of the rolls with clear sellotape on the outside and the inside so it was attached well.
(I would have used fancy glue to make it neater but I didn't have any and I was on a time limit!).
I cut the second toilet roll into four thin strips about 1cm wide.
I stuck these with the PVA over the sellotape that was attaching the clear plastic to cover it and to give the ends of the eye piece some definition. I did two layers to make them stand out more, overlapping them as they were not long enough to go around fully.
I painted the eye pieces gold with black and brown to give it a dirty bronze look.
To make the strap I cut the hems of the jeans off about 3cm up from the end.
I cut the denim in half and cut a 2cm piece off to be the nose piece.
I followed that by measuring around my head from temple to temple to see how long the band of denim had to be and cut it to size with about 1cm extra on each end for sewing allowance.
I shaped the denim with the ends getting larger towards where they would attach to the toliet rolls to look like triangles. This makes a more aviator look I think.
I then hand sewed the triangle ends onto the eye pieces with black thread. It was a little hard going through the cardboard but you could use strong glue if you had some.
Then making sure the band wasn't twisted I sewed the smaller 2cm piece to make the nose piece onto both eye pieces.
The denim was then painted black with gold and brown accents.
I finally added some different shape thumb tacks around the front of the eye pieces to make them look more mechanical and gave these a little brush of paint to blend in.
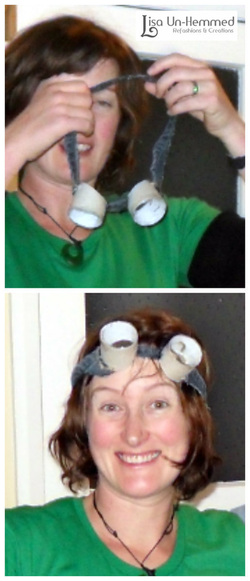
I was really happy how these turned out and made another pair for Mr T for his outfit. It took me one evening to do 2 pairs and mainly took me that long because I had to figure out what to do.
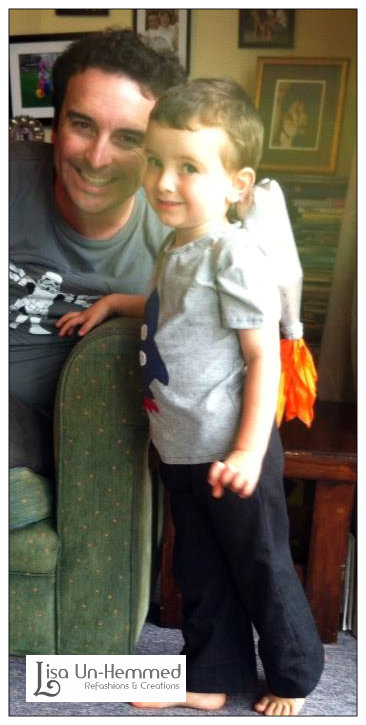
Below is a picture of our full Steam punk Time traveler outfits. We had a blast at the party and have used the goggles for other dress up party's too.
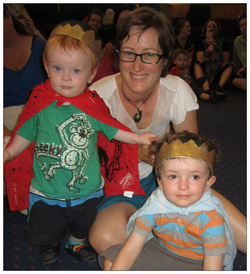
We had our Mainly Music Christmas Party last week and we were asked to dress the kids as wise men/kings, Shepherds or angels.
I raided the dress up box at the last minute for ideas and found some old bandannas that were perfect size for Kings capes and then made the crowns out of newspaper.
I folded the newspaper over a few times to make it stiff and stapled it to the size of the boys heads.
Then I painted points with the top half black and bottom half gold to look like a crown without any annoying fraying paper bits.
Considering this took me approx 5 minutes to do with a little longer for the paint to dry I think they look pretty cute!
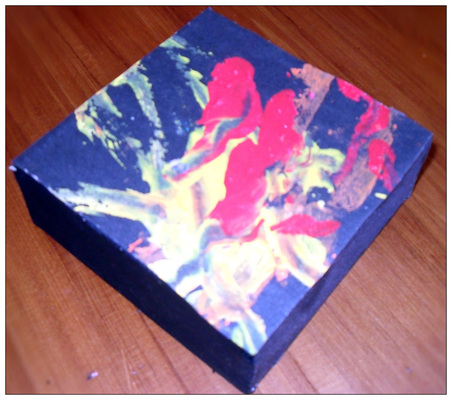
If you have a preschooler anything like Mouse, you will know that 2 year olds create a lot of art! We have big rolls of the stuff that we bring back from playgroup week after week.
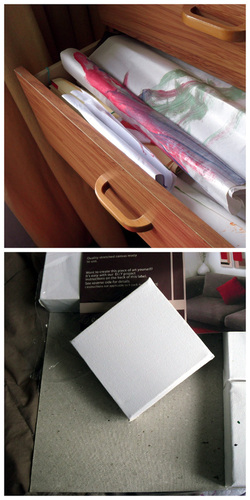
It seems a shame to chuck it out after so much creative energy has gone into making it. But sometimes the art drawer is full to overflowing!
So I decided to save some for our walls and for the grandparents to keep.
I got a 9 pack of square box canvases and painted them black with acrylic paint.
The ones I used were 10cm x10cm on 3.5cm deep.
Then I found some great art Mouse had done on black paper and cut it out to match the 10cm x10cm top of the canvas block and stuck it down carefully with PVA glue.
They turned out really well and I'm sure you could paint the canvas boxes different colours