Mr T has finally let me refashion some of his tired work shirts, which I am super excited about as I have been bugging him for ages to let me use some of the older ones to have a play with.
I saw
this top on Pinterest and thought I could give it a go.
These are the steps I took to do it, but you can refer to the above tutorial for more help.
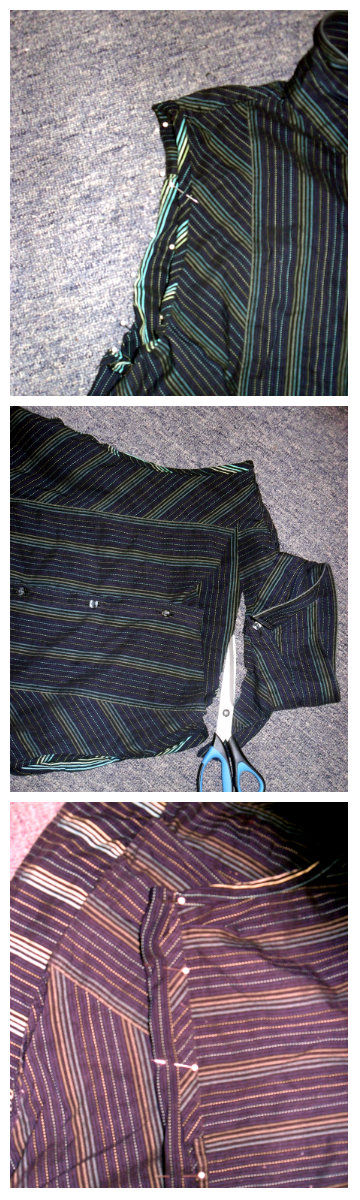
First I cut off the sleeves on both sides.
I then folded the edges over twice to the outside and pinned them.
The colour of the inside was pretty cool and vibrant so I left it like that.
I then sewed it down with a straight stitch.
I then cut off the collar.
The first time I did this I didn't go low enough, and had to re cut it below the back yoke of the shirt to make it sit better.
I then folded the front and back top parts over twice about 2cm to the front and sewed it down with a straight stitch.
This makes a tunnel to thread through cord/ribbon to make the shoulder straps.

I then cut the sleeve material in a spiral to get a really long continuous bit of material about 1.5cm wide.
I folded it in half and over locked the rough edge to make a sturdy cord.
I then cut the cord in half and used one half to thread through the front and back top tunnels.
I used the second half as a tie around my waist.
I really love wearing this top as it is really nice and loose to wear on hot days.
I actually have been wearing it inside out as the inside stitching is really neat and the colours of the inside are so much more vibrant.
But when I wear it the right way you can see the buttons and the inside parts are visible at the arm holes and neck as a sort of bias biding look.
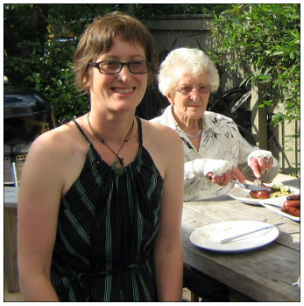
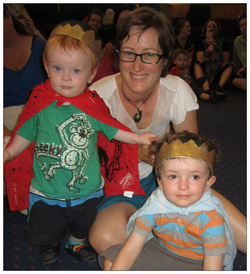
Here is a photo with my lovely Nana and my new top on Christmas eve, which was a very hot day, so I loved having the coolness around my shoulders and loose fitting around my abdomen.
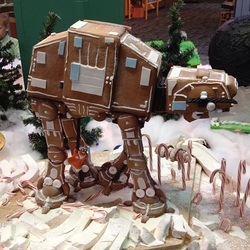
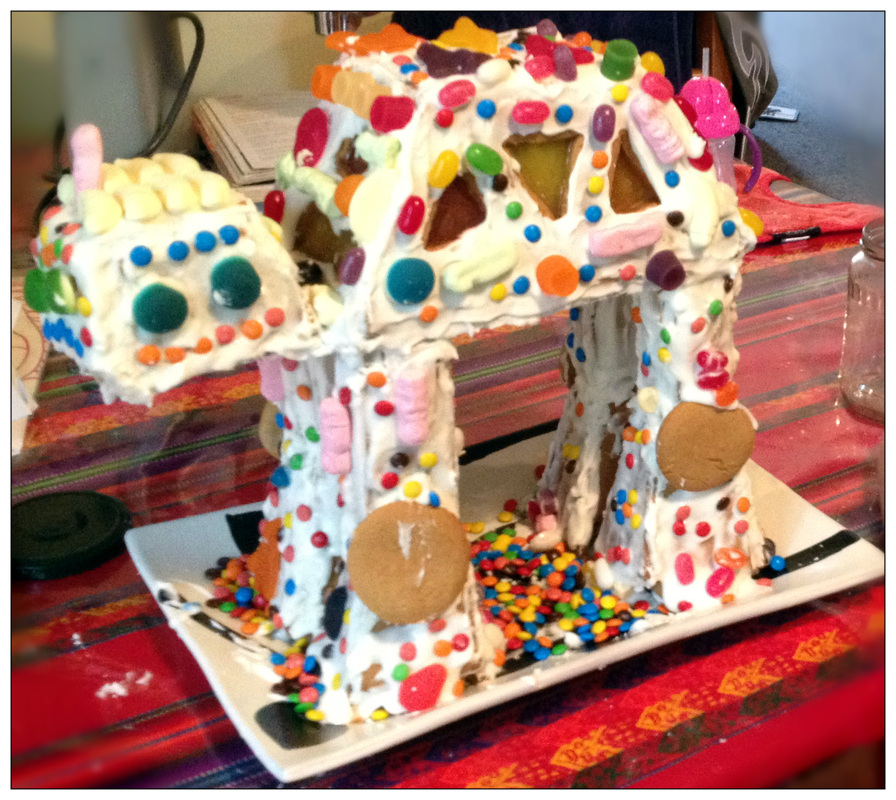
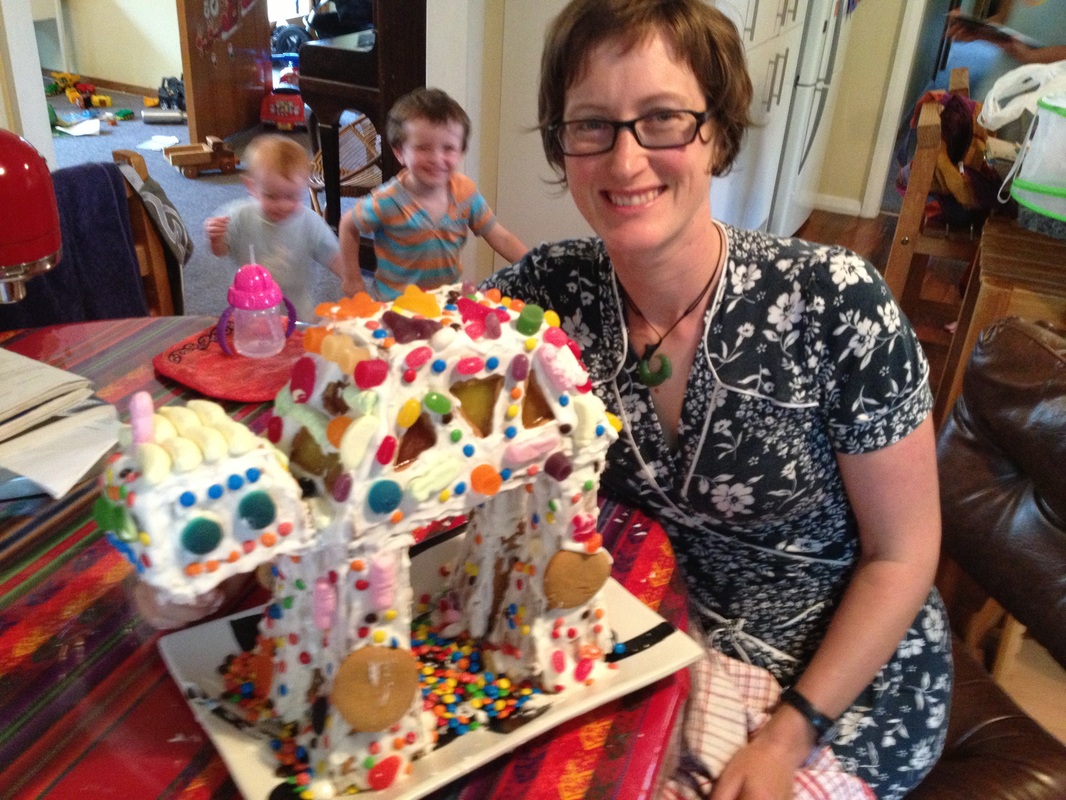
My brother and I were given a challenge this Christmas by an Auntie to create something inspired by
this picture to the Left.
Unfortunately the link to the bakery that originally made it doesn't seem to work but it looked amazing.
We thought we were up for the Challenge so gave it a go.
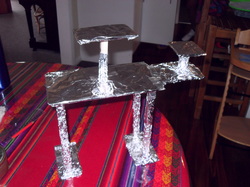
My Brother made an amazing frame work from wooden dowling and a clip board.
He hammered it together and screwed and glued it and then covered it all with foil.
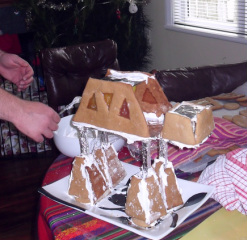
We then stuck it all together with Royal Icing and let it set.
Then it was decorating time with the family help taste testing as we went!
Considering it was our first ever go and we have to make everything from scratch we are super happy how it turned out.
Tigger and Mouse can't wait to attack it either!
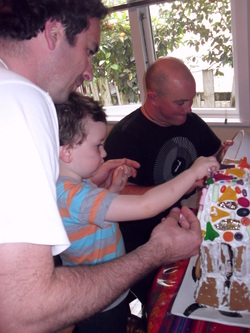
We had our Mainly Music Christmas Party last week and we were asked to dress the kids as wise men/kings, Shepherds or angels.
I raided the dress up box at the last minute for ideas and found some old bandannas that were perfect size for Kings capes and then made the crowns out of newspaper.
I folded the newspaper over a few times to make it stiff and stapled it to the size of the boys heads.
Then I painted points with the top half black and bottom half gold to look like a crown without any annoying fraying paper bits.
Considering this took me approx 5 minutes to do with a little longer for the paint to dry I think they look pretty cute!
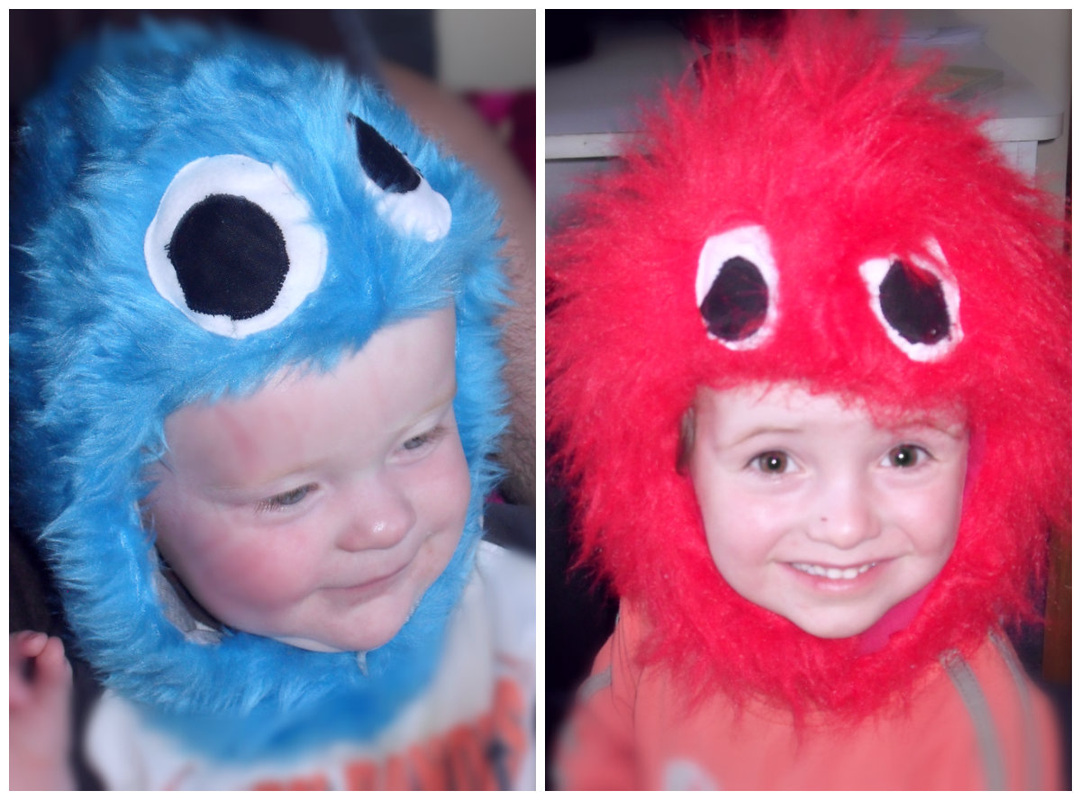
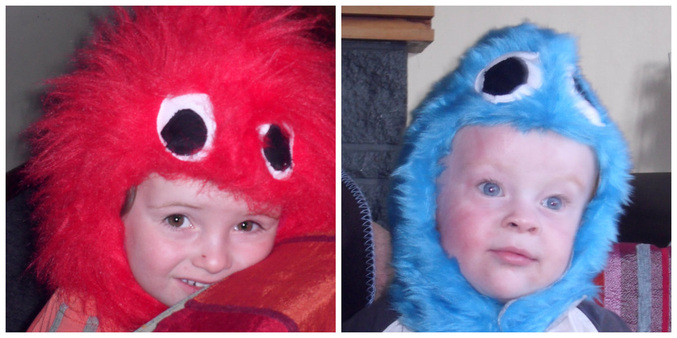
Cookie Monster and Elmo Inspired Hoods
Tigger is turning ONE!! I can't believe my baby boy is toddling around and tearing the place up.
For quite sometime one of the only things that would calm him down if he was upset was to listen to Cookie Monster sing "C is for Cookie". So we have decided to have a Happy Cookie Monster Birthday Party for Tigger. Of course we need dress ups so I came up with the idea to do furry Cookie monster and Elmo inspired hoods for Tigger and Mouse to wear to the party.
I had a look around the internet and have been inspired by the following web sites which have done animal hoods. Have a look if what I have done is not clear enough,
Check out
www.fleecefarm.comhttp://greeneggsnhamm.blogspot.co.nzhttp://www.craftster.orgWhat you will need - for 1-3 year old boysPaper to make pattern
30cm by 50cm approx - Lining material - I used old t-shirts
30cm of 150m roll approx - Fake fur material what ever colour you like - I used red and blue
5cm by 5cm white material for eyes - I used some old fleece
3cm by 3cm black material for eyes - I used some scrap black cotton
Dome Snap clips set
Hammer
Pins and scissors
Matching thread
Sewing Machine
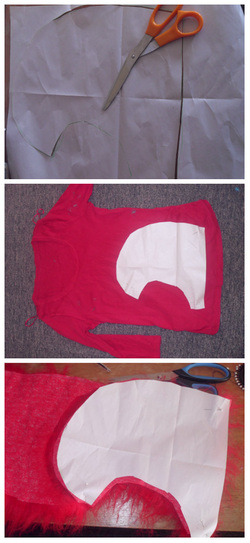
1 - I traced around one side of an animal hood at play group to get the right size and shape of hood I wanted. But check out the fleecefarm web site for a different way of doing it.
I then cut it out to make a pattern.
2. I then used the pattern to cut out two sides of lining for inside the hood.
I used old t-shirts for the lining and just cut through two layers of t-shirt.
3. I used the same pattern to cut out the furry material. Be careful to make sure you have 2 sides of fur. It is probably easiest to fold over the material and cut through two layers.
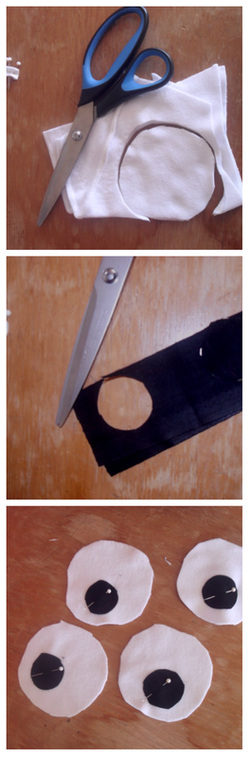
4. To make the eyes fold over the white fabric and cut circles the size you want the eyes to be.
5. Then fold over the black fabric and make smaller circles to make the irises.
6. Pin the black onto the white where you would like them to be placed.

7. Sew the black circles onto the white circles using black thread. You can use zig zag or straight stitch going around the outside of the circle. You could also be very clever and do a proper Applique if you have time.
8. Pin the lining pieces together right sides together and Sew the pieces together from the forehead to the back of the neck. I used a zig zag stitch as it was t-shirt material.
9. Repeat with the furry materials, pinning furry sides together and tucking any extra fur inside while you are pinning. I Used a straight stitch for this.
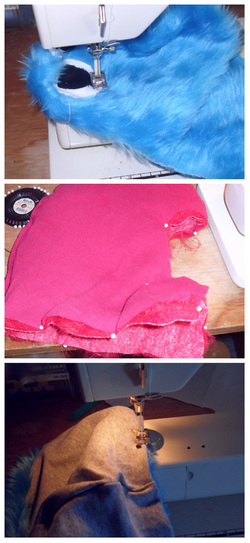
10. Place the eyes where you would like them and pin on. Sew with white thread around the outside of the white part of the eye. You could use straight or zig zag stitch for this.
11. Pin the lining and furry pieces together right sides facing each other. Make sure all furry parts are tucked inside.
12. Sew from the back of the hood around all the seams but leave about 5-10cm at the end and backstitch.
You now need to turn the hood inside out so the furry part and right side of the lining are now on the outside.
You then can fold the last little bits in and finish off closing the hole with the machine - or hand sew it for a neater job.
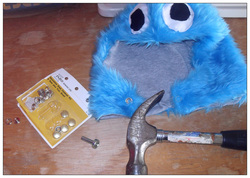
13. Lastly use the dome snap closures on either side of the neck. Use a hammer to knock them into place or follow packet instructions.
You could use velcro but I thought it would get messy with all the fur!!
So there you have it!
My take on Elmo and Cookie Monster inspired hoods.
They are not exactly alike due to different length furs, and I think Elmo has a nose. But the boys love them and we are now set for the Monster Party.
Just need to sort Mr T and myself out now for some Monster madness.
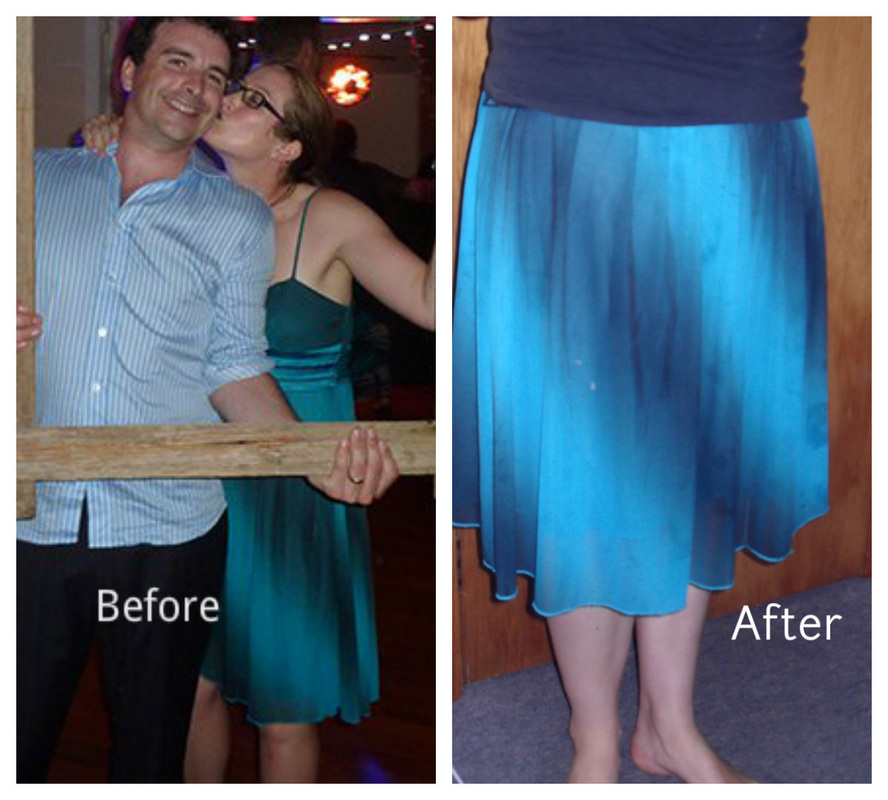
We had a wonderful couple of years when lots of our gorgeous friends got married. I ended up with a lot of dresses suitable to be a wedding guest that have been sitting in my wardrobe unused and unloved.
There doesn't seem to be many occasions to wear a pretty frock when you are surrounded by play dough and finger paint every day.
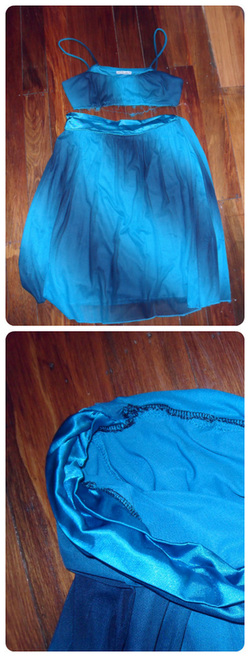
I thought that perhaps I would wear this pretty aqua dress more as a skirt.
Also while looking through Pinterest there seems to be a trend for flowy skirts at the moment.
So firstly I unpicked the bodice from the skirt. I'm going to save that for something else I think.
It was all a bit rough at the top so I over locked the seam.
Then I turned down the top hem about 5 cm and stitched around the top, making a tube.
I then thread some elastic through the tube with a safety pin, and stitched the hole shut.
This has made the skirt about knee length now and is super comfortable and airy. It feels great even on a hot sticky day. The only problems I had was dealing with the satin type fabric at the front of the skirt as it was very slippery to sew with, but it still turned out alright in the end.
I really like how it turned out and have worn the skirt heaps.
Also have had lovely comments every time I have worn it.