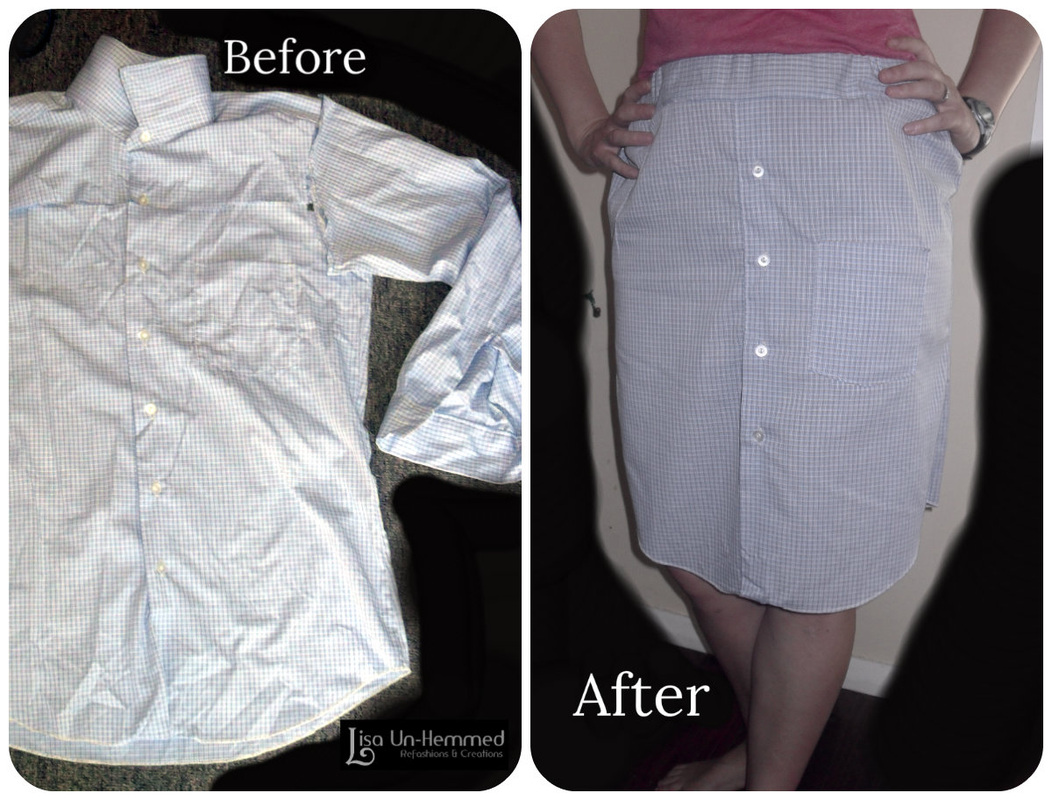
I think I love refashioning Men's shirts! I found this one at an Op shop for about $2 and thought I might be able to do something with it. After last time making a top from a Men's shirt I thought I should try a skirt this time. I had a look around Pinterest and was inspired by this page of ideas.
The Men's shirt was a size 42 and was the largest I could get on that day. Next time I would try to get something larger to have more fabric to play with.
The Men's shirt was a size 42 and was the largest I could get on that day. Next time I would try to get something larger to have more fabric to play with.
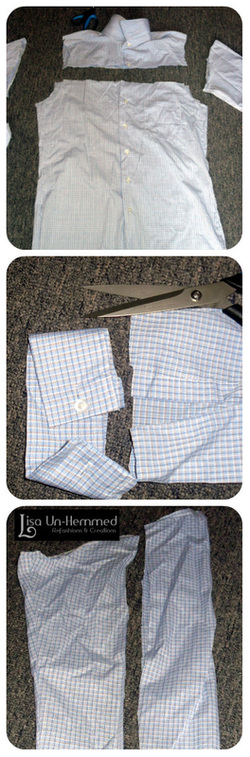
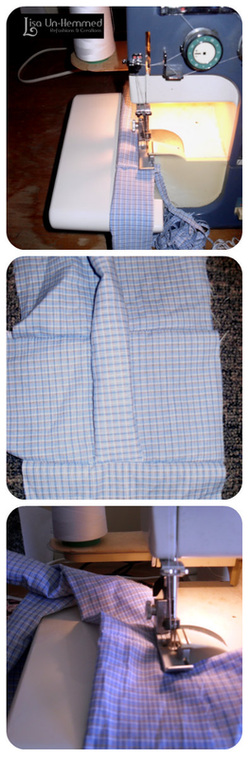
First up I chopped off the sleeves and upper collar area.
I ended up chopping about 5 cm above the pocket as I wanted to keep to pocket detail.
But it ended up being too high on the skirt so I should have just chopped it at the widest part to start with.
Then the scissors chopped off the sleeve cuffs.
I kept the buttons - I love keeping buttons for some reason!
I then chopped the sleeve material in half long ways to make the waist band for the skirt.
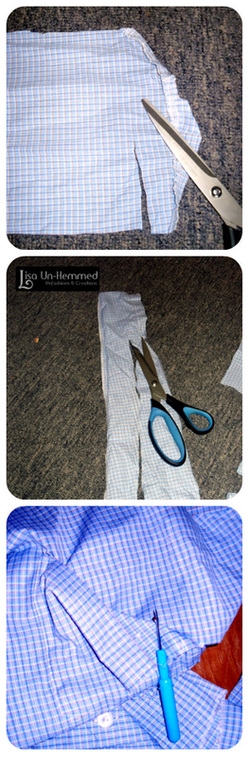
The top of the sleeve was rounded so I straightened it up with the scissors.
I had quite a bit of fabric in the sleeves and thought I could use them as ties to give some interest to the waist so I evened up part to the sleeve fabric to be about 10cm wide.
I decided I wanted to keep the pocket but not in its original place so I carefully unpicked it.
I had quite a bit of fabric in the sleeves and thought I could use them as ties to give some interest to the waist so I evened up part to the sleeve fabric to be about 10cm wide.
I decided I wanted to keep the pocket but not in its original place so I carefully unpicked it.
Then onto some sewing.
I pieced together the sleeve parts for my waist ties and overlocked them together and turned them inside out so the rough edges were on the inside.
I then got the rest of the wider reserved sleeve pieces and overlocked them together to make a circle about 20 cm larger than my waist.
I sewed in the waist ties where my hips would be.
Then I overlocked the waist band to make a tube which ended up being about 10 cm wide.
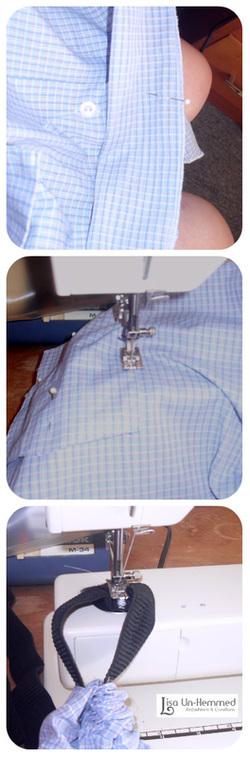
That part was then overlocked onto the rest of the shirt which I had straitened the top of with my scissors. I left a 5cm gap at the back to thread in some elastic.
Then I carefully re sewed the pocket back onto the shirt front lower down.
I also sewed the front of the shirt down by the buttons so when I moved around there wouldn't be any embarrassing gaping parts through the buttoned up part.
Then I threaded 3cm elastic that was cut to fit my waist through the hole in the waistband and sewed the ends together well. Then I sewed the gap up.
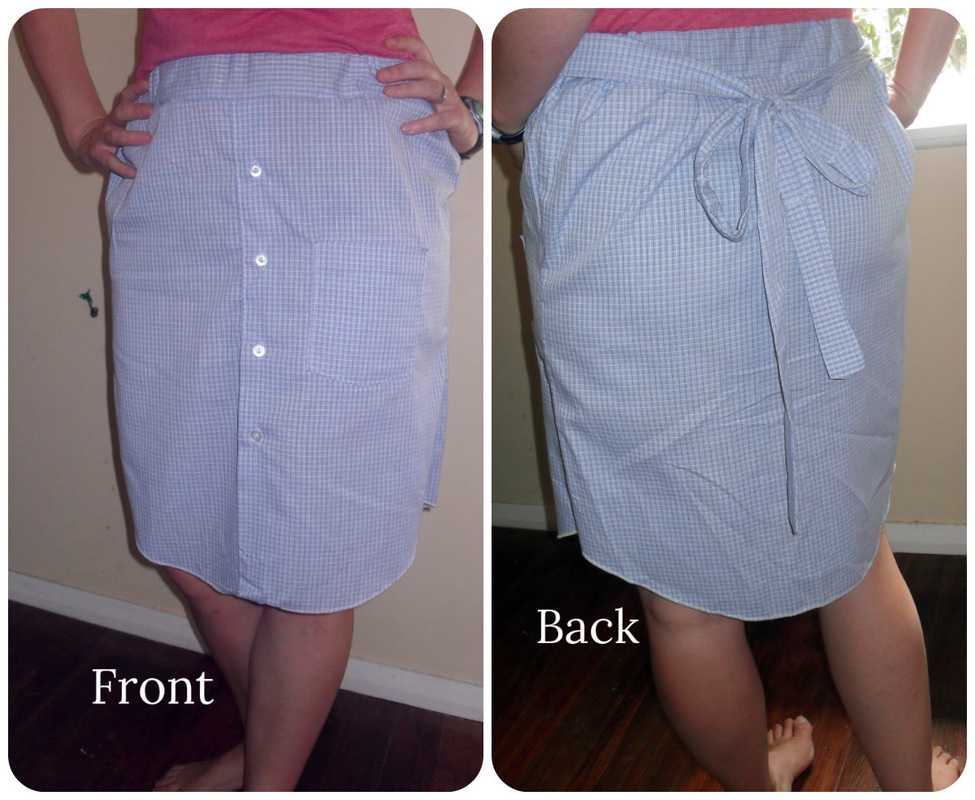
I am really happy how the skirt turned out since I made it up as I went along. The waist ties can be tied to the front or the back. I think I prefer the back as it gives it a bit more interest.
The only thing though is it does look a bit like my high school uniform with the small checks but Mr T doesn't mind that at all!
Then I carefully re sewed the pocket back onto the shirt front lower down.
I also sewed the front of the shirt down by the buttons so when I moved around there wouldn't be any embarrassing gaping parts through the buttoned up part.
Then I threaded 3cm elastic that was cut to fit my waist through the hole in the waistband and sewed the ends together well. Then I sewed the gap up.
I am really happy how the skirt turned out since I made it up as I went along. The waist ties can be tied to the front or the back. I think I prefer the back as it gives it a bit more interest.
The only thing though is it does look a bit like my high school uniform with the small checks but Mr T doesn't mind that at all!